Why Should Users Import MBOX to Outlook 365?
In this digital age where mail has taken center stage in business and personal interaction, there are great advantages that one gets by converting from MBOX file format to Outlook 365 in any general mail client. Here are some reasons why users need to import MBOX to Outlook 365:- Smooth Access To The Cloud: Outlook 365 being a web-based service means all the emails are saved in the web and not in conventional email applications After done, emails safely reside in the MBOX files. Thus it’s possible to retrieve this information within any device, anywhere, and at any given time. It is no longer dependent on scheduling for using some particular machine to carry out the emailing activities.
- Security and Compliance Enhancement: Outlook 365 was designed with security and compliance in mind. There are also these wonderful tools within that to which at another level of migration, MBOX to Outlook 365, will allow you access, threat protection, and compliance tools. This ensures the protection of important information from external forces as well as helping in implementing measures such as business data retention policies and compliance which are very important for businesses that deal with sensitive information.
- Enhanced Collaboration: Office 365 facilitates teamwork as it is not only compatible with Microsoft Teams but also with SharePoint and OneDrive, including emails. It enables project work by allowing sharing of documents and reducing communication barriers among different groups. Importing files from MBOX into an email increases the ability to work together.
Challenges to Import MBOX to Outlook 365
Transitioning from MBOX to Office 365 gets complicated, more so for those who have no idea how the technical aspects work. Below are some of the common barriers that most users face in the process:- Office 365 Does Not Provide MBOX Native Support
- Risks of Loss of Data
- Manual Migration Requires a Lot of Time
- Dealing with MBOX Files of Large Size
Method 1: Manual Process of Importing MBOX to Office 365
Step 1: Set up Microsoft 365 to Work with Thunderbird
- The Mozilla website offers a free download of the Thunderbird email client.
- Launch the email client.
- On the first run, it will ask for email creation. Choose skip and use the existing email account option.
- In the next window that appears, fill up the name, M365 email address, and password and click on Configure manually option.
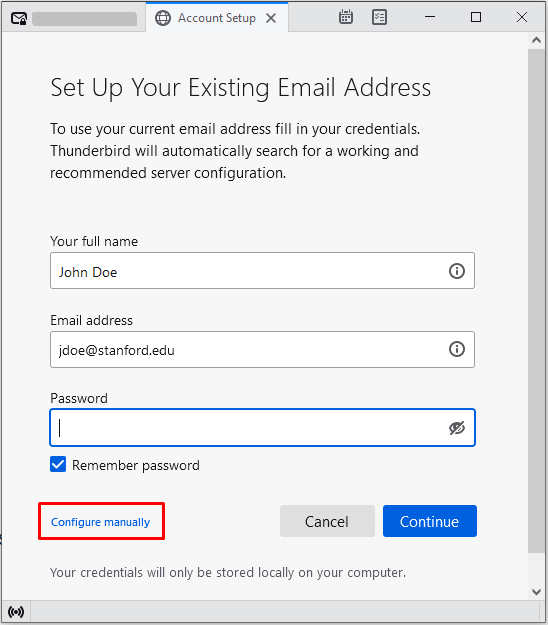
- Now, enter the details from the screenshot given below:

- Authenticate the account and finish the configuration process.
Step 2: Import MBOX Files in the Same Application
If the configuration process is successful, the Office 365 account will appear in the email client panel.- In Thunderbird, choose Add-ons from the Tools menu.
- Search for ImportExportTools NG in the Extensions tab.
- Select +Add to Thunderbird.

- Proceed to restart the application once you install the add-on.
- Then, right-click on the Local Folders, select ImportExportTools NG, and then Import MBOX File.
- Finally, select and import the file.
Step 3: Upload Your Files to Microsoft Office 365
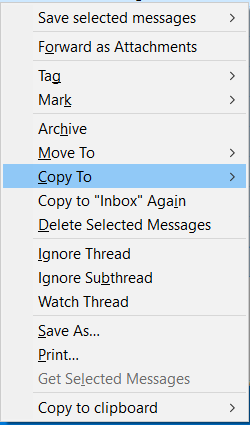
- Select all the MBOX emails imported earlier.
- Next, right-click and select Copy To from the menu.
- Finally, select the Office 365 account.
 Now, the process to import MBOX to Outlook 365 is complete.
Pros and Cons of Using This Method
Pros:- This process is completely free to use.
- You can import MBOX files without any restrictions on the file size.
- The process to import large MBOX files is quite slow, especially if you transfer a lot of emails.
- This process can be prone to human error such as incomplete imports, or issues in configuration which can ultimately lead to loss of data.
- Users who are not familiar with the configuration of the email clients such as Thunderbird could find this process quite difficult, and complicated.
Method 2: Using an Automated Tool to Migrate Seamlessly
While the manual methods work for most users, they are quite time-consuming and complex, especially for not technologically inclined users. Fortunately, an automated tool offers users a more efficient and user-friendly solution to import MBOX to Outlook 365. It is the SysTools MBOX to Office 365 Migrator Tool. It is to automate the entire process so that you can import your important data safely and quickly with just the click of a button. Here are some of the key features that this tool has to offer:- You can upload several MBOX/MBX/MBS to your Office 365 account.
- Users can add files or folders using this option.
- You can import MBOX to Outlook 365 with all the types of attachments.
- There is an in-built filter option to export the chosen MBOX emails in Outlook 365.
- This tool retains the original hierarchy of the folder during MBOX emails to Office 365.
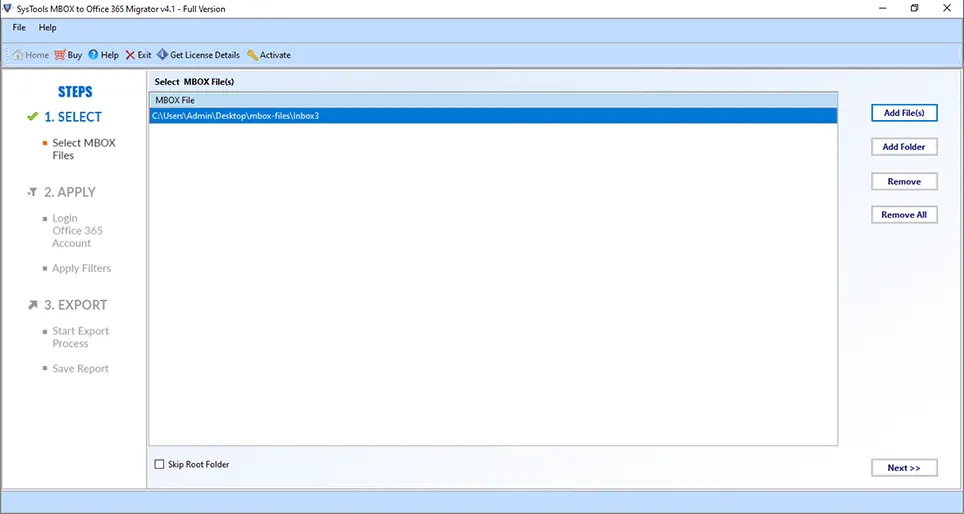
- Download and install this tool.
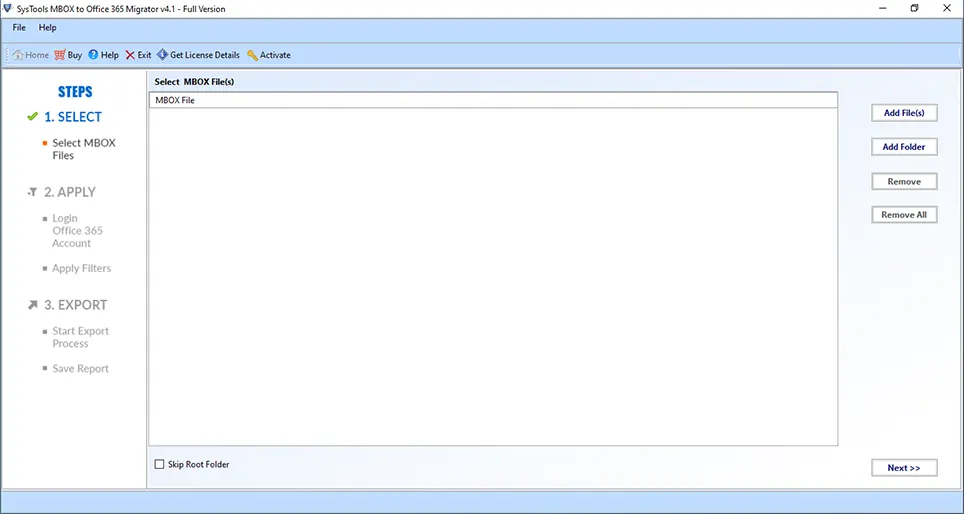
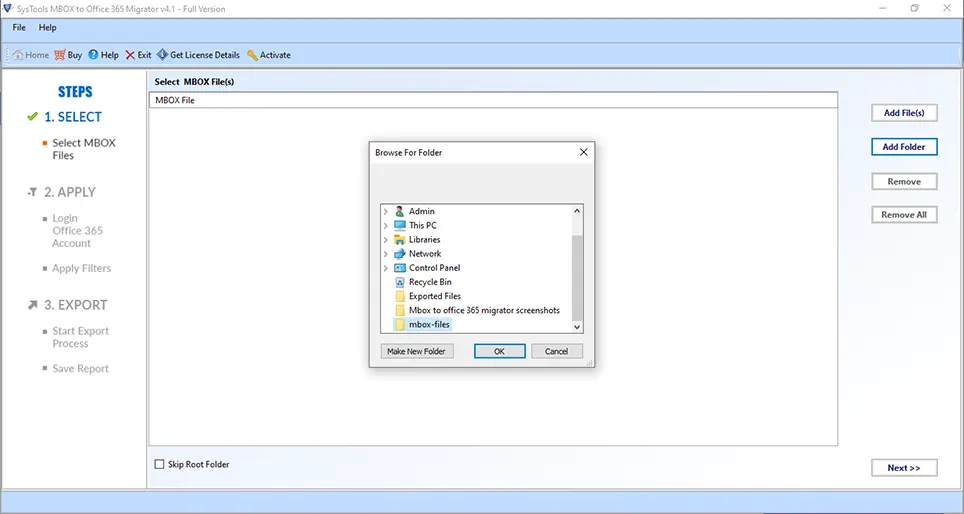
- Click on the add file option or the add folder option according to your needs.

- Select the folder/file, and then click on the OK button.
- Once you add the file, show the MBOX file that you have imported to the tool, and then click on Next.
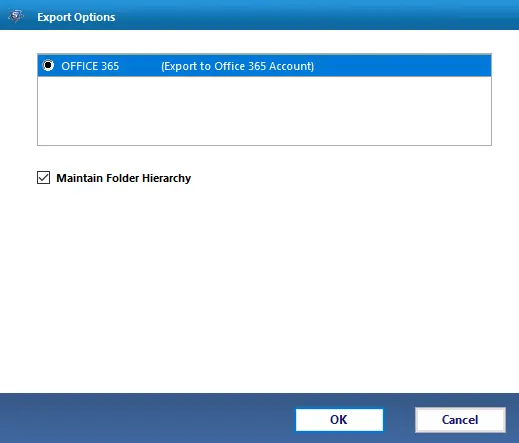
- On the next screen, you will be able to see the Office 365 Radio button.
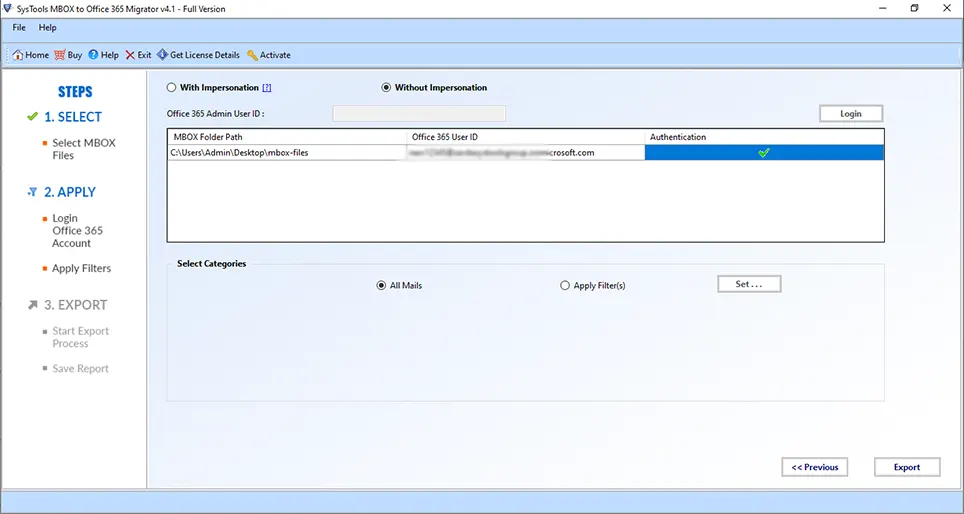
- Now provide the credentials for the mailbox.
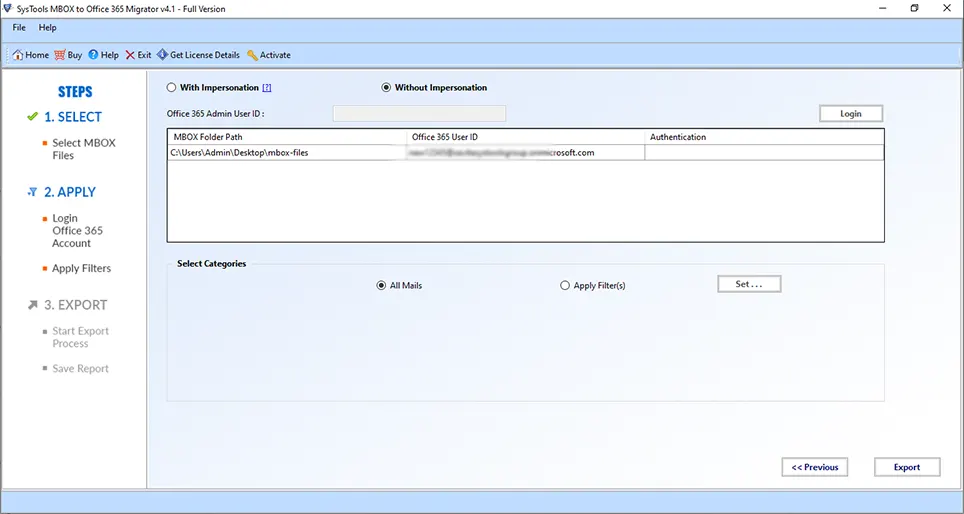
- Now validate the mailbox ID after putting in the credentials of the Office 365 account.
- You can also apply the filters that are relevant to your needs using the Apply Filters button, and then click on Set.

- Now, click on the export button to start the import MBOX to Outlook 365 process.

Best Practices to Successfully MBOX to Outlook 365 Migration Process
You can migrate the emails from MBOX to the Outlook 365 process to follow certain best practices. Whether performing the migration process using the manual or the automated method, you should adhere to the guidelines to avoid pitfalls and ensure the transfer of the data.- Back up the MBOX Files First, Before starting with the migration process, it is important to create a backup of all the MBOX files. This will allow users to protect the data if anything goes wrong during the migration process.
- Testing with a small batch, If you are migrating large volumes of data, then it is a good idea to test the migration process using a small batch of emails. This will allow users to identify the issues that may come up during the migration process.
- Ensuring that the connectivity of the internet is stable, The migration of emails can take a lot of time and requires a stable internet connection. If the internet connection is unstable then, there could be problems in the migration process which could lead to incomplete transfers or corruption of data.
- Monitoring the Migration Process, During the migration process, you should monitor the process, especially if you are handling large files. Keep an eye on the error messages and address the issues immediately. This can save you from corruption of files, or failed migration.
- Verify the Migration of the Data, After migrating MBOX files to Office 365, don't take it for granted that everything went smoothly. Verify that every email, folder, attachment, and data detail made it over. Double-checking for missing emails or wrongly placed folders prevents data loss or mishandling.
Conclusion
If you are handling smaller volumes of data, and do not mind the effort that it takes, then the manual method is a good choice for you. On the other hand, if you're handling a big database or want a solution that is simple, quick, and free from any errors, resorting to automated tools would be the best option. Such programs not only streamline these processes but also help in preserving your information and making it retrievable. You should take all the necessary precautions, such as creating file copies, performing dry runs on small sample sizes, and supervising the procedure to circumvent frequent migration threats, irrespective of the approach you wish to adopt. When the methods stated above are followed, it is possible to carry out an MBOX to Office 365 migration successfully and quickly without losing any important data or taking prolonged breaks. Take the time to evaluate your needs, choose the right tools, and you’ll soon be banking on secured cloud storage from Microsoft Office 365 for all your emails.Frequently Asked Questions
Is It Possible to Import the MBOX Files into Outlook 365?
You cannot directly import MBOX to Outlook 365 since this feature is not available. To migrate MBOX email messages to Outlook 365, some external applications or intermediate email programs such as Thunderbird will be needed.
Is the Transformation of MBOX to PST Files Unavoidable in Outlook 365?
Yes, it is very often the case that MBOX needs to be converted to PST as emailing support in Outlook 365 is only available for PST format. Therefore, this conversion is done by many of the third-party migration tools.
How Much Time Does It Take to Export MBOX to Outlook 365?
The time taken purely relies on the MBOX file size, the number of emails contained, and the intel net connection. It can range anywhere from a couple of minutes to even several hours of modifying.