Table Of Content:
- Why do Users Need to Transfer Emails From One Mailbox to Another?
- Preparing to Transfer Office 365 Mailbox to Another Account
- Methods to Transfer Office 365 Mailbox to Another Account
- Drawbacks of Performing the Manual Methods
- Transfer Office 365 Mailbox to Another Account Using PowerShell
- Using an Automated Tool to Transfer Office 365 Mailbox to Another Account
- Conclusion
- Frequently Asked Questions
Why Do Users Need to Transfer Emails from One Mailbox to Another?
There are several different reasons why organizations migrate emails to another account:- Acquisition of Companies, During the process of acquiring a company, the parent organization may set up a new Office 365 subscription. It would also need to move emails from one Office 365 account to the other.
- Migration of Departments, In several companies, once a project reaches its end, they are migrated to a new department. This needs the transferring of all of the data from Office 365 to another account.
- Staff Attrition, When employees leave an organization, they can take their important emails. For future purposes, they need to migrate the Office 365 mailbox to another account.
- Requirements of Compliance, Several organizations need to meet several legal requirements. It is a good option to back up the emails from Office 365 to another account. This way the data can easily be accessed and audited.
Preparing to Transfer Office 365 Mailbox to Another Account
If you plan to move emails from one mailbox to another under the same tenant, then check the license of the user. Even if there is a need to create a new account, then you should upgrade the Office 365 subscription plan according to the user requirements. In case you need to copy the Office 365 mailbox to another account, you should purchase the required subscription plan and create the users in the new tenant. You can keep both the old as well as the new tenants active as long as the Office 365 to Office 365 migration process completes. You can then delete the secondary email addresses if they are not needed anymore.Methods to Transfer Office 365 Mailbox to Another Account
Method 1: Users can Migrate Emails From One Office 365 Account to Another.- Login to the new Office 365 account.
- Setup > Data Migration > View Migration option.
- Choose the Other Email Sources to continue.
- Enter the name of the server, the port, as well as the security.
- Enter the old Office 365 account email address, and password.
- Choose the new Office 365 account and enter the ID and password.
- Start the process of migrating the Office 365 account to another account.
- Download and install the Outlook desktop version on your PC.
- Configure the old Office 365 account in Outlook.
- Export the Office 365 mailbox from Outlook that you configured to PST.
- Import PST file to new Office 365 using the network upload method.
- Open the Office 365 admin center, and go to “https://admin.microsoft.com”
- In the left pane, select Users, and then go to active users. This will open an existing Office 365 user’s account. This will be associated with the respective admin account.
- Select the needed user accounts that you need to migrate. You can then click on the mail option for the right pane.
- Click on the manage email forwarding option.
- Enable the forwarding of all emails that are sent to the mailbox.
- Provide the destination email address where you need to move the emails.
- Enable the required options and select the save changes button.
Drawbacks of Performing the Manual Methods
- You need to have the technical knowledge and admin access to set up the forwarding of emails.
- This is not a practical alternative to transferring Office 365 mailbox to another account.
- Email forwarding cannot be set up for older email data. It works only for upcoming emails.
- You will have to keep the source account active along with its proper license. This would lead to an increase in operational costs.
- Setting up the forwarding of emails for several users can be a time-consuming and daunting task.
Also Read: Learn How to Take Backup of Office 365 Mailbox - Efficient Approach to Follow
Transfer Office 365 Mailbox to Another Account Using PowerShell
- Run PowerShell as an administrator and run the following command to ensure that it is correctly running, “Search-Mailbox -Identity “Old User” -TargetMailbox “Current User” -TargetFolder “Old-Mailbox” -LogLevel Full”.
- You will now have to ask one of the global admin members or be one yourself to enable remote PowerShell by running the following command, “Set-User user@xyz.com -RemotePowerShellEnabled $true”.
- Ensure that the TCP Port 80 is open between Office 365 as well as your PC. Run the following command as an administrator, “Set-ExecutionPolicy RemoteSigned”.
- You can save the credentials that can be saved up into a variable for later use, “$usercredential = Get-Credential”.
- Now, save this session into a variable, “$session = New-PSSession -configurationname Microsoft.Exchange -connectionUri https://outlook.office365.com/powershell/ -credential $usercredential -authentication Basic -allowredirection”.
- Import them using the following command, “Import-PSSession $session”.
- Now we can transfer the Office 365 mailbox to another account using the following command, “Search-Mailbox -Identity “Old User” -TargetMailbox “Current User” -TargetFolder “Old-Mailbox” -LogLevel Full”.
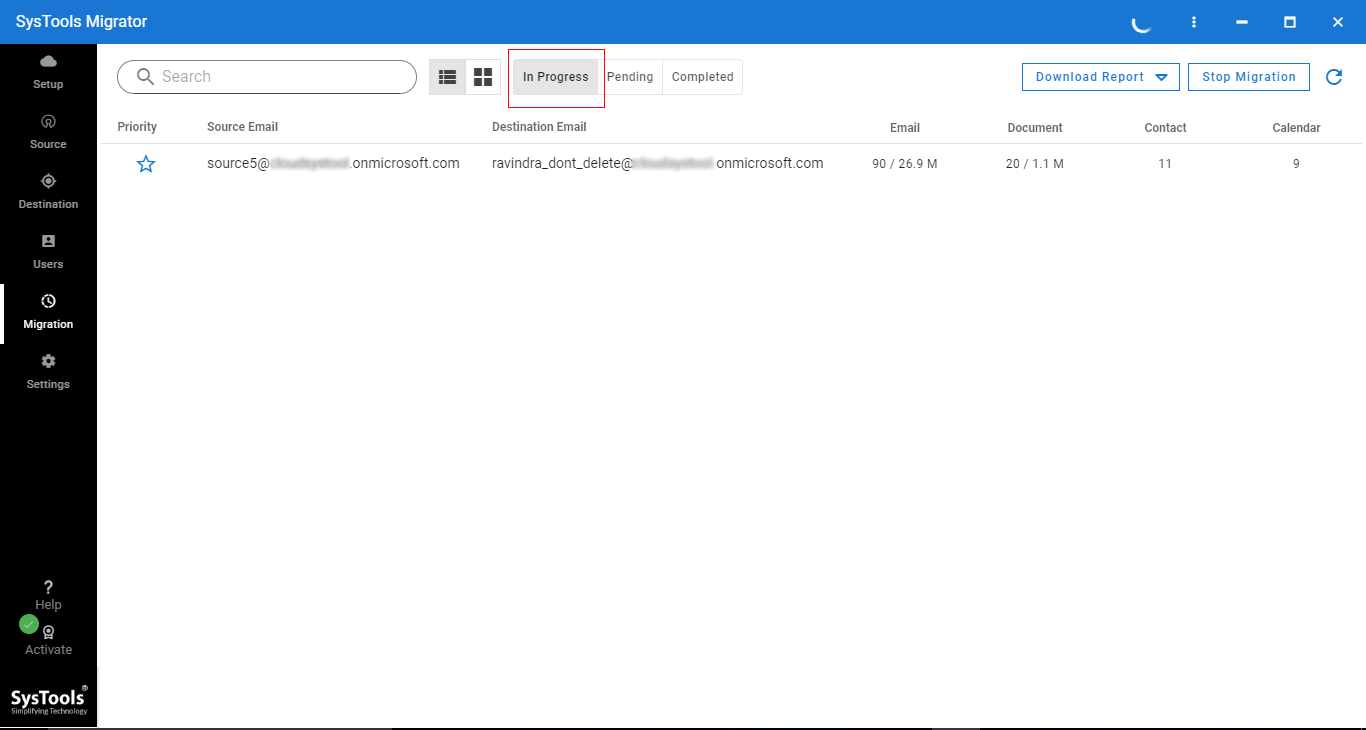
Using an Automated Tool to Transfer Office 365 Mailbox to Another Account
From the above complex methods, it is quite clear that email forwarding is not the right way to migrate the data. This has several limitations that make it difficult to work with too. Hence, Office 365 admins suggest opting for professional tools that can complete this migration process with ease. Keeping this in mind, you can use the Office 365 to Office 365 migration tool. There are some prerequisites that users should keep in mind before starting the migration process:- Before migrating the emails from one account to the other, you will have to create a project in Microsoft Azure and then generate an application ID to perform the migration process.
- After you create a project and generate the application ID, we need an activation code for the tool to transfer the Office 365 mailbox to another account.
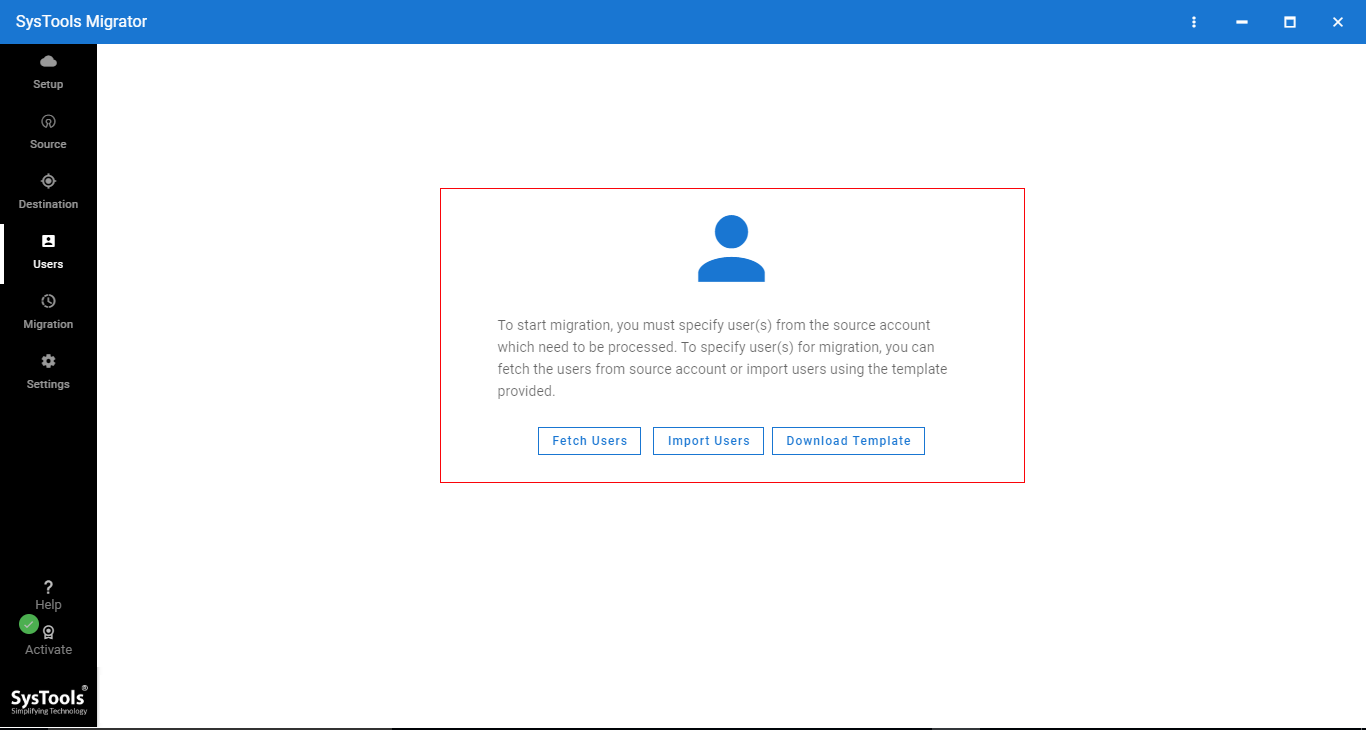
Steps to Use the Automated Tool
- Launch the tool and choose Office 365 as the source as well as the destination.
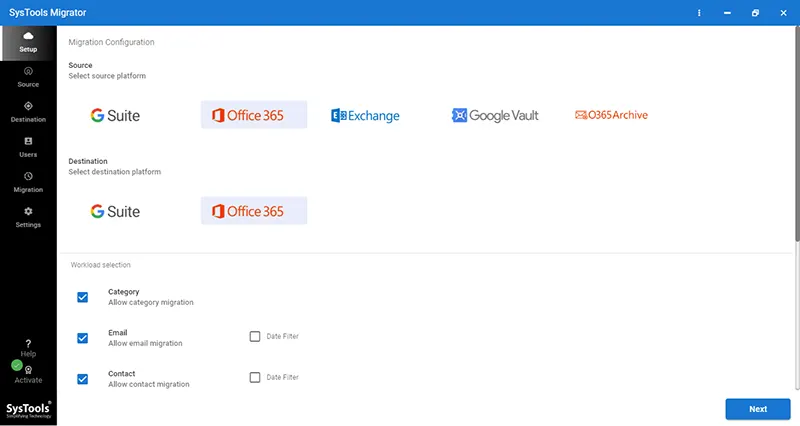
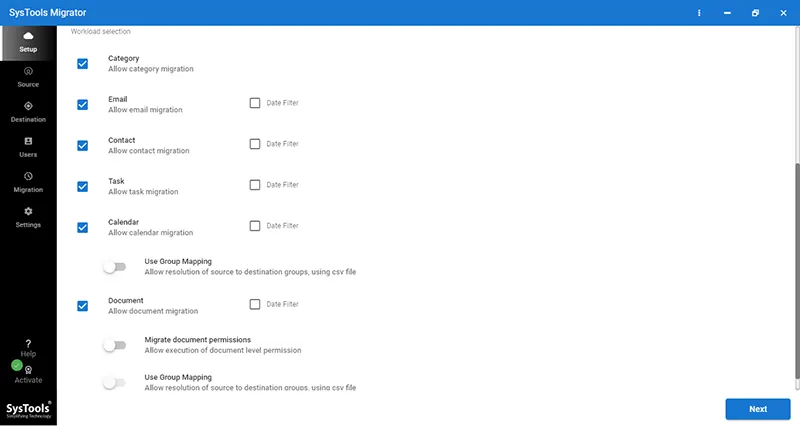
- Using this tool, you can migrate emails, and other important documents, calendars, and contacts to another Office 365 account.
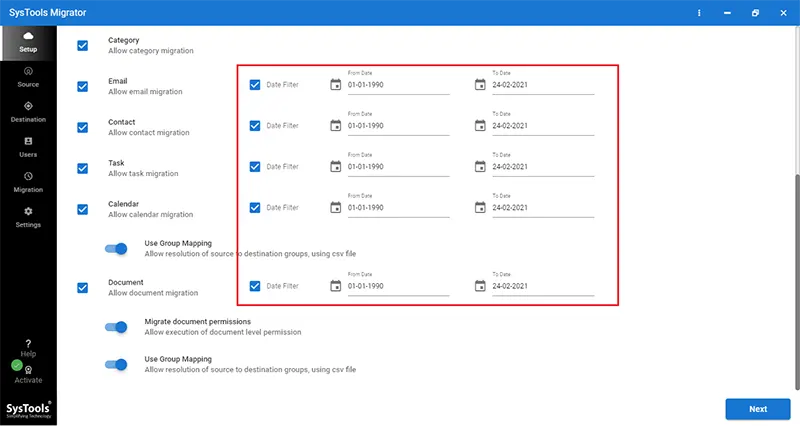
- You can also use the date filter option to migrate selective data.
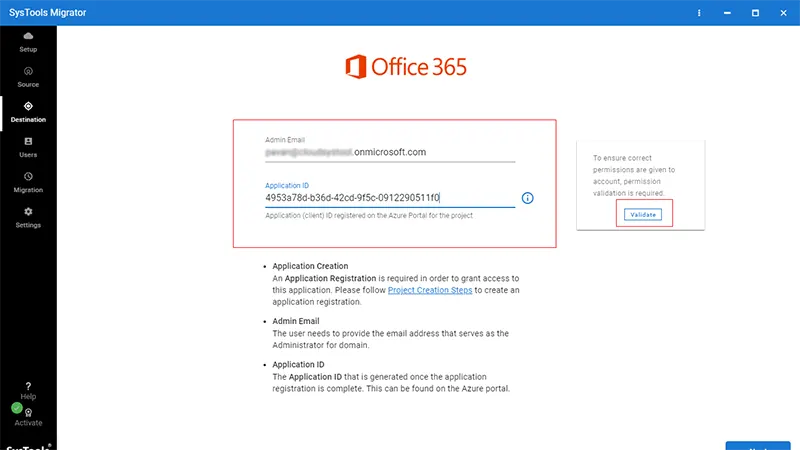
- Log into the source with the admin email as well as the application ID, and validate them to transfer Office 365 mailbox to another account.

- Log into the destination with the admin email and the application ID, and then validate them.
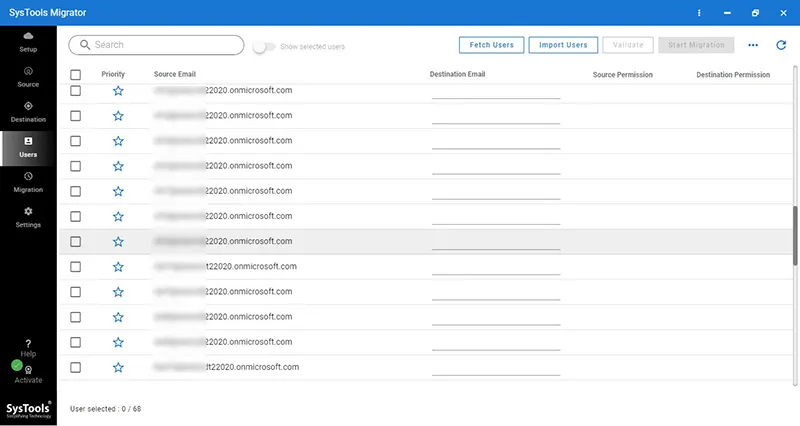
- Select the fetch users option to fetch all the source tenant users in order to move emails from one account to another in Office 365.
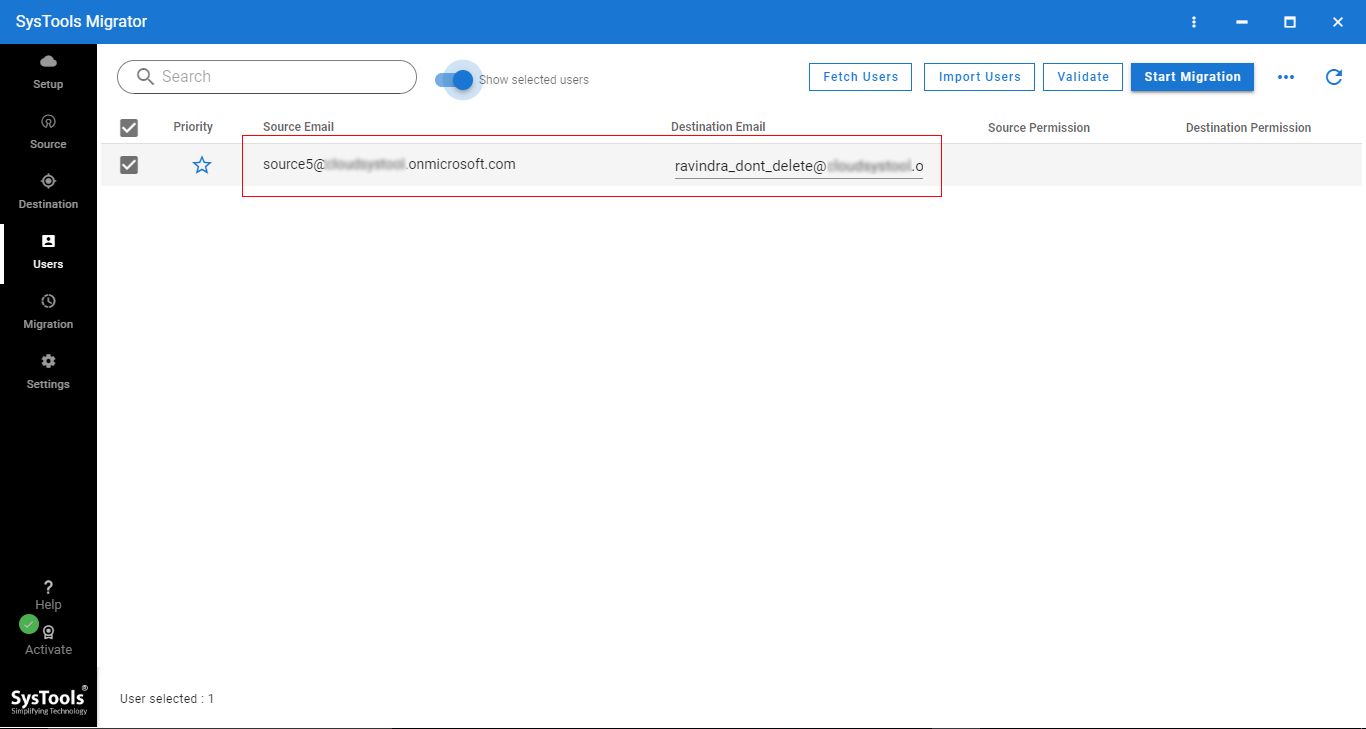
- You will also be able to get mapping options to create a mapping between the source and the destination account. You can import the CSV file where you will maintain the source and the destination user ID.
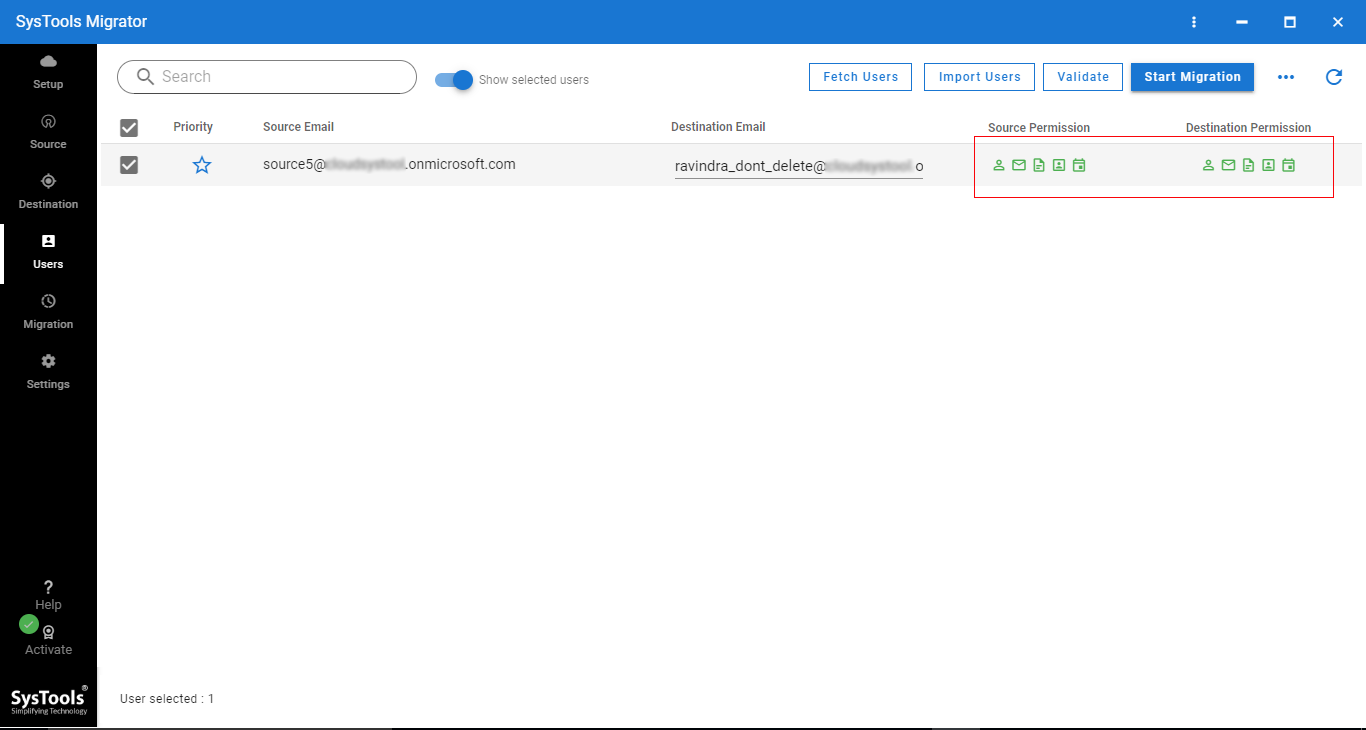
- Click the validate button after mapping the source as well as the destination button to transfer Office 365 mailbox to another account.
- Click on the start migration button after validating the permissions in the source as well as the destination.
- The migration process will complete in just a few minutes.
Conclusion
It is not easy to transfer Office 365 mailbox to another account. There are several aspects that you need to determine to perform this process. We have explained all the steps to perform this complex process without losing your data in this article. We have also given you a tried and tested solution that will allow you to easily migrate all of your data with just the click of a button.Also Read: Learn How to Migrate Exchange 2013 to Office 365 Step By Step
Frequently Asked Questions
How Can We Move Emails from One Account to Another in Office 365 Without Using PowerShell?
If you do not want to use manual methods and need a way to transfer all of your data without needing PowerShell, then you can use the tool mentioned in this article. Use the following steps to perform the migration: Launch the tool > Choose Office 365 . Choose the mailbox > Date Filter . Give Office 365 admin details > Validate . Create a mapping > Validate > Choose users . Click on the Start Migration button.
Can I Migrate Different Mailboxes Using This Tool?
Yes, you can migrate the shared mailbox to Office 365 and also in-place archive mailbox using the tool discussed in this article. You will have to simply select the user IDs and provide the destination email ID. Then click on the start button to start the migration process. This way, you can migrate different types of mailboxes to another account.