Since your email database contains lists of names and email addresses of potential clients, important business deal emails, etc, it becomes essential to take backup of such crucial information. Therefore, in this writeup, we are going to answer the user query i.e. "how to back up your Office 365 email database to your local computer?"
Also, there is no risk in carrying an extra copy of all your important emails. In fact, you can avoid the negative consequences of external security threats, uncertain data loss, etc. by taking backup. Further, with your emails on the local computer, you can access your data offline and that is anytime.
However, many Office 365 users are having a common query. That is how to backup Office 365 email database to a local computer?
Well, to answer that, there are numerous methods available. And, we will discuss some of the effective methods(both manual and expert suggested methods) to carry out the backup process. Read on till the end to find out the solutions.
Let’s first have a look at the solution recommended by professionals.
Quick Fix to Backup Office 365 Email Database to Local System
Where other formulas fail to mitigate any technical problems, software rests the case!
Hence, many IT personnel suggest trying the software Office 365 Backup Tool for backing up your sensitive files in .pst format. With the help of the tool, you can also protect your valuable data of Office 365 shared mailbox(s) by downloading the same to the local drive.
Guided Steps with Screenshots to Backup Your Office 365 Email Database to Your Local Computer
Whatever may be the size of your email database, by following the below simple steps you will easily backup your data quickly and effectively.
Step-1. Download and run the software. Then go to the ‘Set up’ section. Select Source and Destination as ‘Office 365’ and ‘Outlook’ respectively.
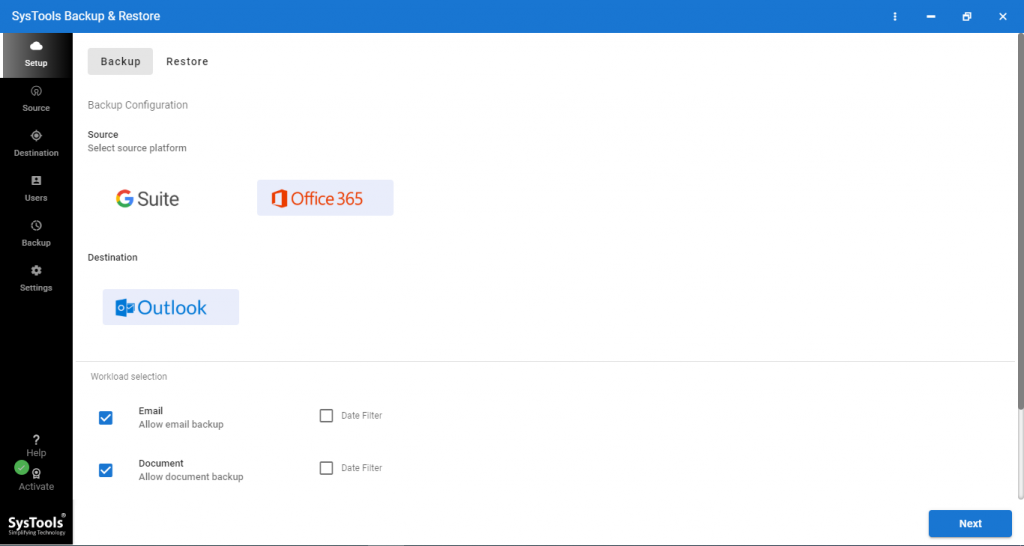
Step-2. After that, under the ‘Workload Selection’, tick mark the desired actions such as ‘Email’, ‘Contact’, ‘Calendar’, etc.
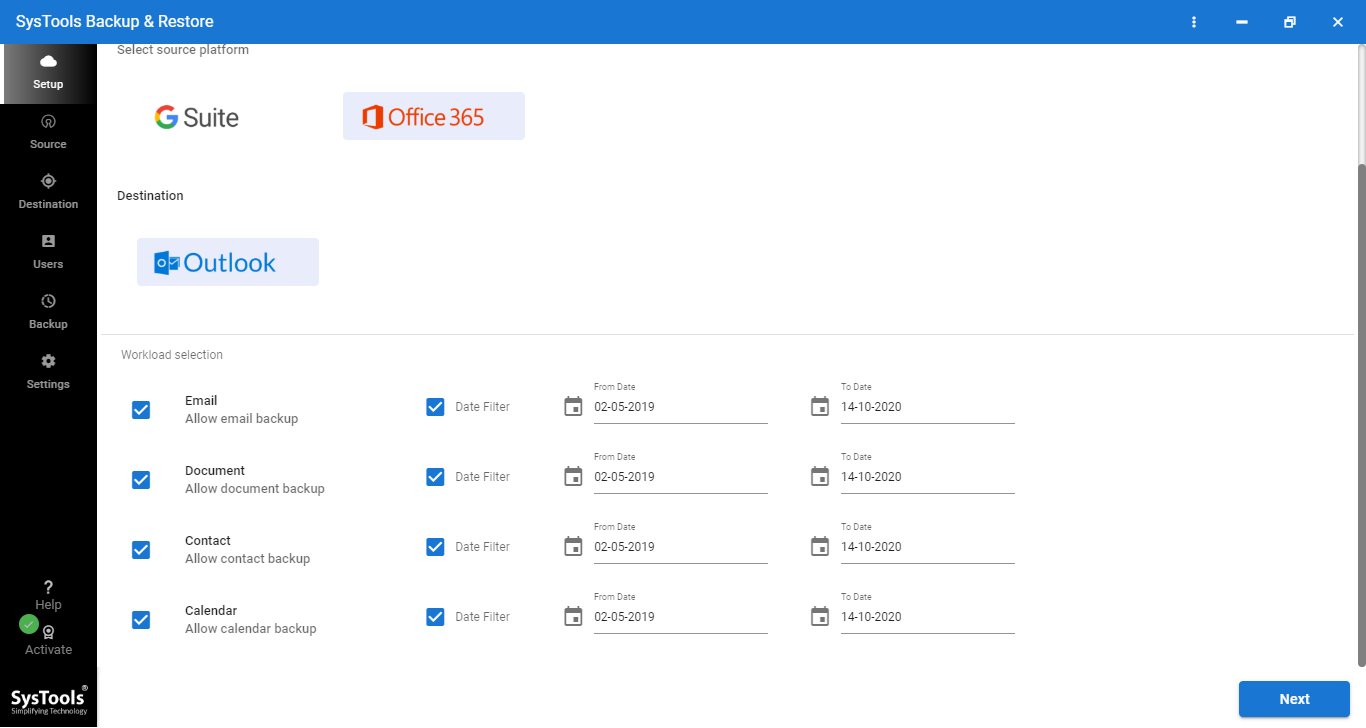
Step-3. Select the required time duration and perform a selective backup by using the ‘Date-range Filter’ as shown below.
Step-4. After that, jump to the ‘Source’ tab. And enter the ‘Admin Email’, also fill in the ‘Application ID’ that was generated at the time of project creation.
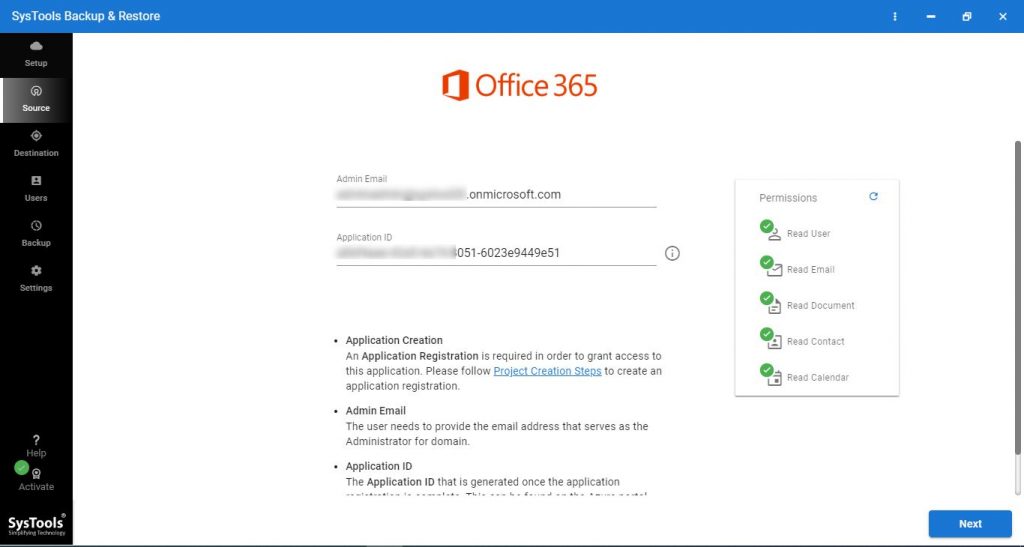
Step-5. Now, make sure to validate the source user permission and click on ‘Next’
Step-6. Then, go to the ‘Destination’ tab and select the ‘Backup folder path’ where you want to save the data.
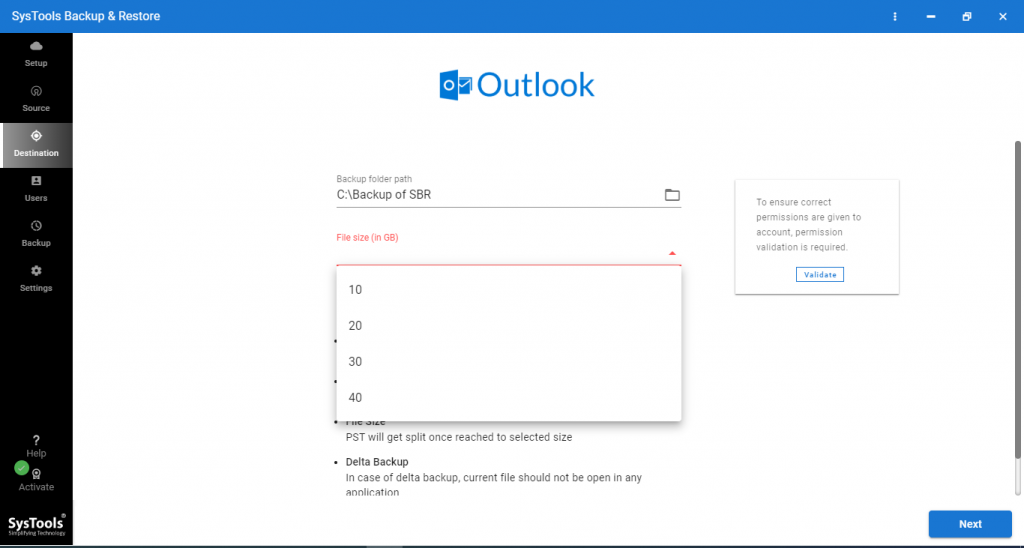
Step-7. After selecting the destination path again validate and click on the ‘Next’ button.
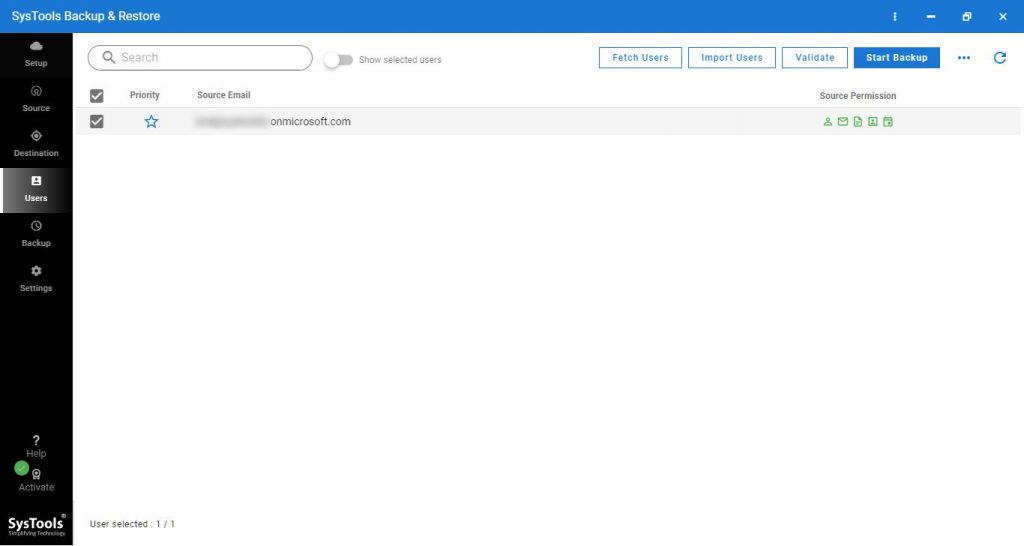
Step-8. On the next screen, click on ‘fetch users’ to select a list of users.
Step-9. At last, validate and click on ‘Start Backup’ to get a solution on user query i.e. "how to back up your Office 365 email database to your local computer?"
The above automated method is the best option when it comes to backup your Outlook 365 emails.
However, some Office 365 users(who have fewer emails to backup) want to know about a solution to backup manually.
Are There Any Native Methods Available to Back up Your Office 365 Email Database to Local Computer?
If you are also curious about finding the answer to the above question like other Office 365 users. Then, yes the tech giant provides two different manual methods for its users to backup their Outlook 365 emails.
One is using Export/Import wizard and the other is by content search eDiscovery method. To attain the backup process using the latter method is quite complex and you must have an admin account to do the same.
Hence, let’s discuss the prior method that can be used by any O365 user for saving your emails.
How to Back up Your Office 365 Email Database to Your Local Computer Using Export/Import Wizard?
If you have configured Outlook then move ahead with the below steps. Otherwise, go to File>>Add account and configure further.
Step-1. Fill in your Microsoft Outlook account credentials and open it. Then, straight go to the top left corner of the Outlook ribbon and click on ‘File’.
Step-2. After that, on the left-hand side of your screen, you will find ‘Open & Export’, click on it. Further, select the ‘Import/Export option.
Step-3. Choose the action ‘Export to file’
Step-4. Hit the ‘Next’ button.
Step-5. Create your file type by selecting the ‘Outlook Data file(.pst)’.
Step-6. Click the ‘Next’ button.
Step-7. Then, select the mailbox folder you want to export.
Step-8. Mark the ‘Include sub folders’ checkbox to backup the entire mailbox. Otherwise, choose the folders you want to export from the list.
Step-9. Press ‘Next’
Step-10. Select ‘Browse’ and choose the location of your choice to save Outlook (.pst) file. Then, under ‘Options’ select the desired radio button.
Step-11. Finally, click on the ‘Finish’ button to get the answer on "how to back up your Office 365 email database to your local computer?"
[Note: You can protect your PST files with a password by entering the fields or you can leave it blank and click on ‘OK’]
Your emails will be saved on your local computer in (.pst) file format after systematically following the above steps.
Must Read: Can You Move a Teams Channel to Another Team? Get Your Query SolvedConclusion
Losing important data could cause serious damage to any organization. Now, you have two different methods to carry out the backup process i.e expert’s suggestion and manual approach. The choice is yours on "how to back up your Office 365 email database to your local computer?"